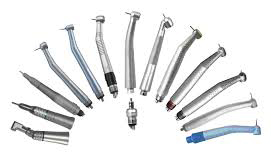
A Guide to Air Driven Dental Handpiece Maintenance
In last week’s blog, we discussed the differences between air driven and electric dental handpieces. Understanding these differences is a great first step to prolonging the life of your handpieces. Each type of handpiece operates differently, and therefore requires different maintenance procedures. In this week’s blog, we will give you step-by-step instructions on air driven dental handpiece maintenance. If you follow these simple techniques, you will save money and time in the long run!
Air Driven Dental Handpiece Maintenance Protocol:
Step 1: Surface clean the dental handpiece
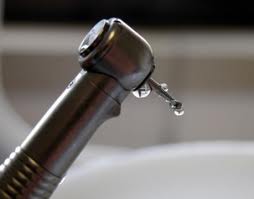
Flush water through the handpiece for 30 seconds. The CDC calls for this in order to remove potential contaminants from the handpiece’s internal water line. Then use a brush under running water to remove any debris from the outside of the dental handpiece. It’s best to hold the handpiece upright so that water doesn’t get into the head of the handpiece.
Very important: Do not use chemical solutions while cleaning! Chemicals can interfere with the sterilization process and harm the handpiece.
Step 2: Dry the dental handpiece
This might seem simple, but it is a vital step in the air driven dental handpiece maintenance process. It is especially important if your practice utilizes a chemiclave. Excess water could lead to corrosion inside the handpiece. This will cause major problems down the road.
Step 3: Lubricate the dental handpiece
Spray oil into the drive air line using the proper lubricating tip. To ensure that the bearing have been lubricated, continue spraying until oil comes out of the handpiece head.
Some dentists prefer to use a dropper. To use this method, simply drop two or three drops of oil to the drive air line and then immediately run the handpiece.
Step 4: Run the dental handpiece to expel excess oil
Run the dental handpiece after lubrication to make sure that oil is evenly distributed through the bearing and chuck mechanism. This will also expel excess oil so that you avoid coagulation during the autoclave process. Make sure to install a bug, NOT a bur blank, into the chuck and then turn on the handpiece for 20 seconds. After operating, remove the bur.
Pro-tip: Invest in an air-flush station in the sterilization area to eliminate a return trip to the operatory to run the handpiece. All you need is a connection to compressed air!
Step 5: Clean fiber-optic surfaces:
Very important! Use alcohol and a Q-tip to remove excess oil and gunk from all fiberoptic surfaces. This will prevent buildup and discoloration, ensuring a long life for your dental handpiece!
Step 6: Bag the handpiece:
The CDC recommends that you bag ALL instruments and dental handpieces so that they remain sterile.
Tip: use a combination paper/plastic bag so that steam can evaporate through the paper side while you can still view the contents of the bag.
7. Sterilize:
Follow the manufacturer’s guidelines while autoclaving the dental handpiece. The paper bag should be paper side up in the autoclave.
Important: Allow the sterilizer to completely process through the dry cycle. If there is still dampness after the cycle has completed, leave the instruments in the autoclave until it the bag is completely dry.
We hope that this helps you understand the basic of air driven dental handpiece maintenance. Stay tuned! Next week we’ll be discussing common mistakes people make when maintaining their handpieces.
If you run into any problems with your electric OR air-driven handpieces, First Choice Repair has 25 years in solving problems with dental handpieces. Just contact us, we’d love to help.


1.800.569.6627